

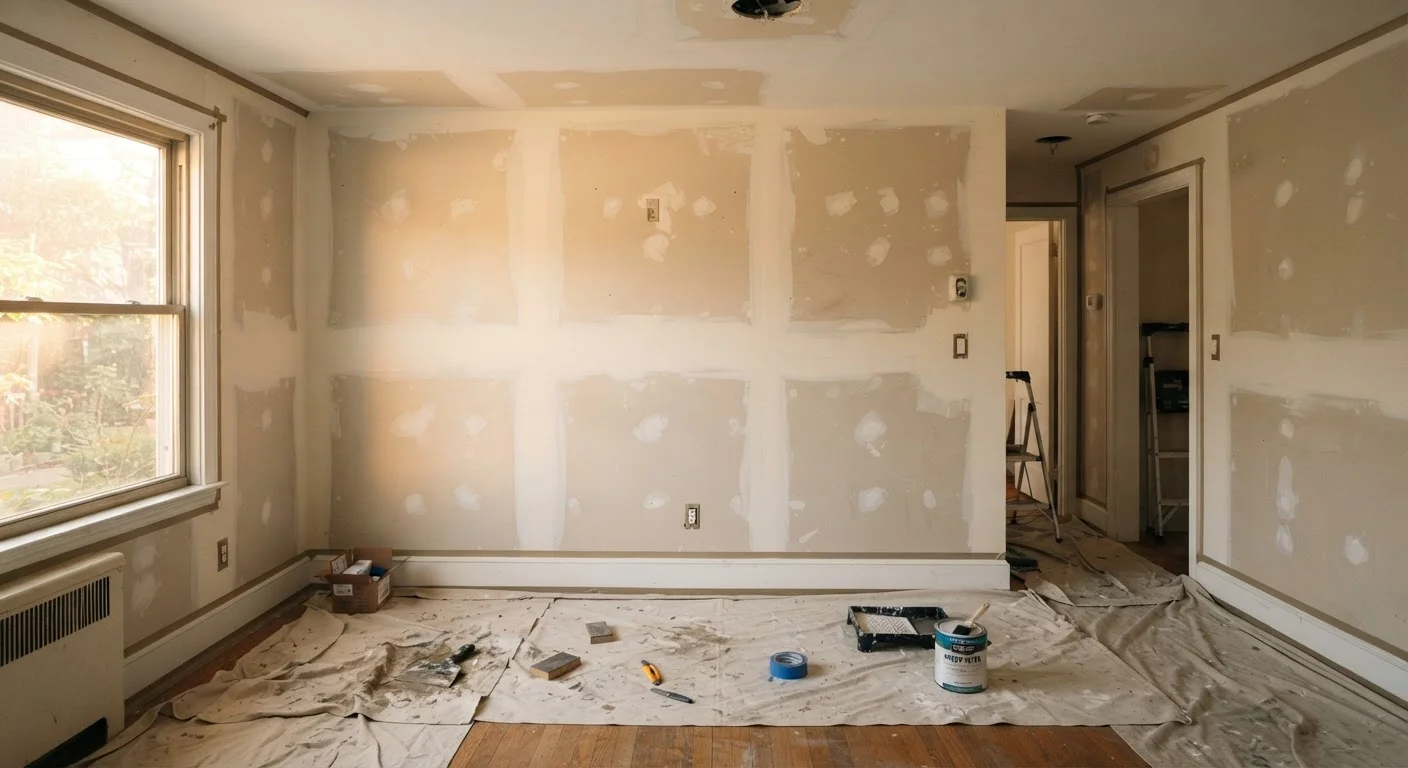
Why Prep Work Determines Paint Longevity
A fresh coat of paint on unprepared walls might look acceptable for a few weeks - but without proper surface prep, you're likely to see bubbling, peeling, and uneven color within a year or two. The paint itself is rarely the problem; the surface beneath it is.
Adhesion - the ability of paint to bond firmly to a surface - depends entirely on what that surface looks like at a molecular level. Dust, grease, moisture, or an overly smooth sheen all interfere with that bond. Patching and priming create the right conditions for paint to stick and stay.
This is the same principle behind why deferred maintenance compounds over time. Much like skipping small car repairs leads to larger failures, skipping prep steps on a paint job leads to results that cost more to fix than doing it right the first time. If you're preparing your home for sale or an upcoming inspection, thorough prep work also signals care and quality - see our home inspection prep checklist for other areas inspectors commonly flag.
Drop cloths
Protect floors and furniture from drips, dust, and paint splatter during prep and painting.
Painter's tape
Mask trim, outlets, and edges to create clean, straight paint lines.
Spackle or joint compound
Fill nail holes, cracks, and surface imperfections before painting.
Putty knife (3-4 inch)
Apply and smooth patching compound into damaged areas of the wall.
Sanding sponge or 120-grit sandpaper
Smooth patched areas and scuff glossy surfaces to improve paint adhesion.
Trisodium phosphate (TSP) substitute or mild degreaser
Clean walls of grease, smoke residue, and dirt that would prevent paint from bonding.
Primer
Seal patched areas, stains, and bare drywall so paint adheres evenly and color appears consistent.
Lead test kit
Check for lead paint in homes built before 1978 before any sanding or scraping.
Before You Start: What You Need
Gathering supplies before you begin saves multiple trips to the hardware store and keeps momentum going once you start. Review the prerequisites below, then confirm you have each tool on hand.
What you will need
Older Homes May Contain Lead Paint
If your home was built before 1978, existing paint layers may contain lead. Do not sand or scrape painted surfaces without first testing with an inexpensive lead test kit available at hardware stores. If lead is present, consult a certified lead abatement professional before proceeding. Disturbing lead paint without proper precautions creates serious health risks.
Step-by-Step: Interior Paint Prep
Follow these steps in order. Each one builds on the last - skipping ahead is the most common mistake homeowners make when they're eager to get to the actual painting.
Clear and protect the space
Remove as much furniture as possible. What can't be moved should be pushed to the center of the room and covered with drop cloths. Lay additional drop cloths on the floor along every wall you plan to paint - canvas drop cloths are more stable than plastic sheeting, which tends to slip.
Remove wall plates from outlets and light switches. Loosening them and letting them hang is not enough; paint will seep behind them and create a messy result.
Clean the walls thoroughly
Paint bonds to clean surfaces, not dirty ones. Wipe down all walls with a TSP substitute or mild degreaser mixed with warm water, using a sponge or cloth. Pay close attention to areas near the stove, above doorways, and anywhere hands frequently touch - grease and skin oils are invisible but real barriers to adhesion.
Rinse walls with clean water after washing and allow them to dry completely before moving on. This step is commonly skipped, and it's one of the top reasons paint peels prematurely.
Patch holes, cracks, and damaged areas
Use a putty knife to press spackle or joint compound into nail holes, small cracks, and any dents. For holes larger than about a quarter-inch in diameter, you may need a two-step process: fill partially, let dry, then apply a second pass and sand smooth once fully cured.
For longer cracks along seams or corners, use paintable caulk rather than spackle - it remains slightly flexible and won't re-crack with normal house movement. Allow all repairs to dry fully according to product instructions before sanding.
Sand all patched areas smooth
Once repairs are fully dry, lightly sand each patched spot with a fine-grit sanding sponge or 120-grit sandpaper until the surface is flush with the surrounding wall. Run your hand across each patch - you shouldn't be able to feel an edge.
If your existing walls have a glossy or semi-gloss sheen, lightly scuff the entire surface with a pole sander and fine-grit paper. Paint needs micro-texture to grab onto; a very smooth, glossy surface will cause adhesion problems over time.
Wipe down walls with a slightly damp cloth or tack cloth to remove all sanding dust before priming.
Apply primer where needed
At minimum, spot-prime every repaired area with a shellac-based or PVA primer. If you're working with bare drywall, switching to a significantly darker color, or painting over stains (water marks, smoke damage, crayon), prime the entire wall surface.
Let primer dry completely - typically one to two hours for water-based primers, longer in high humidity. Don't skip this; bare spackle and porous surfaces absorb paint unevenly and will show through your finish coat as flat, dull patches.
Tape trim, edges, and fixtures
Apply painter's tape along baseboards, window and door trim, ceiling edges, and around any fixtures that couldn't be removed. Press the tape edge down firmly with a putty knife or your fingernail - a loose tape edge allows paint to bleed underneath and ruins crisp lines.
Remove painter's tape while the paint is still slightly tacky (not fully dry) by pulling it back at a 45-degree angle. Waiting until paint is completely dry risks peeling off finish with the tape.
Don't Skip the Drying Time
Applying paint over surfaces that haven't fully dried - whether after cleaning, patching, or priming - is a leading cause of bubbling, peeling, and poor adhesion. Always follow the manufacturer's recommended drying times on every product you use. In humid climates or during winter with heating running, add extra time. Rushing this step consistently produces results that fail within months.
Prime Every Patched Spot
Spackle and joint compound are porous - paint applied directly over them will absorb unevenly and appear as dull, flat spots called 'flashing.' Spot-prime every repair with a shellac-based or PVA primer before applying your finish coat. This one habit makes a visible difference in the evenness of your final color.
Common Mistakes and How to Avoid Them
Even careful homeowners run into a few predictable pitfalls during paint prep. Here are the ones that come up most often - and how to sidestep them.
- Painting over dirty walls: Grease and grime are invisible once dry but create a barrier paint can't penetrate. Always wash before you do anything else.
- Skipping primer on patches: Unpainted spackle is highly porous. Without primer, your finish coat will look dull and splotchy in repaired areas, requiring extra coats to compensate.
- Using too much spackle at once: Thick applications shrink unevenly as they cure, leaving depressions that need refilling. Apply in thin layers.
- Leaving tape on too long: Painter's tape left on overnight or through a full cure can bond to the paint film and tear it away when removed. Pull it off while the paint is still slightly wet.
- Rushing between steps: Every product - cleaner, spackle, primer, paint - has a drying time for a reason. Cutting corners here produces the exact peeling and bubbling problems prep is meant to prevent.
Interior painting is one of the more budget-friendly home improvements you can take on yourself. If you're weighing this project against others, our renovation prioritization guide can help you decide where painting fits in your overall plan.
The content on this site is for informational purposes only and is not a substitute for professional advice. Always consult a qualified professional for guidance specific to your situation.